

Building a show
This is the complete workflow for programming a show in Helm DJ. It assumes the app is installed, licensed, and seeing your decks — if not, start with Getting started.
The short version:
- Create a setlist
- Get the tracks into it
- Set each track’s timecode offset
- Program cues on each track
- Configure outputs (timecode + MIDI)
- Rehearse with LIVE disarmed
- Go live
1. Create a setlist
Section titled “1. Create a setlist”Go to the Tracks page. In the left sidebar, open the list picker and choose + New List…. Name it after the show (Mainstage Friday, Club Tour A).
The active setlist is the one the cue engine works from — cues only fire for tracks in the active list. You can keep multiple setlists (one per show, one for rehearsal) and switch between them; see Tracks & setlists.
2. Get tracks into the setlist
Section titled “2. Get tracks into the setlist”Three ways, mix and match:
Capture from a deck (most common). Load the track on any CDJ. Then either:
- On the Tracks page, click the capture button for that deck in the sidebar, or
- On the Decks page, click Capture on the deck card — this also jumps you straight to the track’s detail view.
Capture pulls the track’s metadata (title, artist, BPM, duration) and waveform from the CDJ.
Add manually. Use the add-track form in the sidebar when you’re programming ahead of time without the USB — enter title, artist, BPM, duration. Later, when the real track is loaded on a deck, link the placeholder to it from the track detail view.
Import a bundle. If someone else already programmed the show, import their .helm bundle — see Tracks & setlists.
3. Set the timecode offset per track
Section titled “3. Set the timecode offset per track”If you’re driving a timecode-programmed lighting desk or media server, each track needs a Start Offset — the timecode value the outside world should see when this track starts.
Select the track, find Start Offset in the metadata row, and type the timecode (HH:MM:SS:FF). A common scheme is one hour per track: track 1 starts at 01:00:00:00, track 2 at 02:00:00:00, and so on — so the desk always knows exactly which song it’s in no matter what order the DJ plays them.
When the track plays, Helm DJ outputs start offset + elapsed time as LTC/MTC.
4. Program cues
Section titled “4. Program cues”Select a track, scroll to the Cues section, and add cues with the trigger buttons:
- + On-Load — fires when the DJ loads the track onto a deck. Typical use: preset the desk to the song’s base look before it even starts.
- + On-Play — fires when the deck starts playing.
- + On-Unload — fires when the track is ejected or replaced.
- + Timeline — fires when the playhead crosses a time you set. This is your workhorse for drops, breakdowns, and scene changes.
Click any cue to open the editor: name it, set the trigger time, choose the action (MIDI note, CC with optional fade, external command, or a no-output marker), and hit Test to fire it immediately and verify the receiving end reacts. Full detail in Cues & triggers.
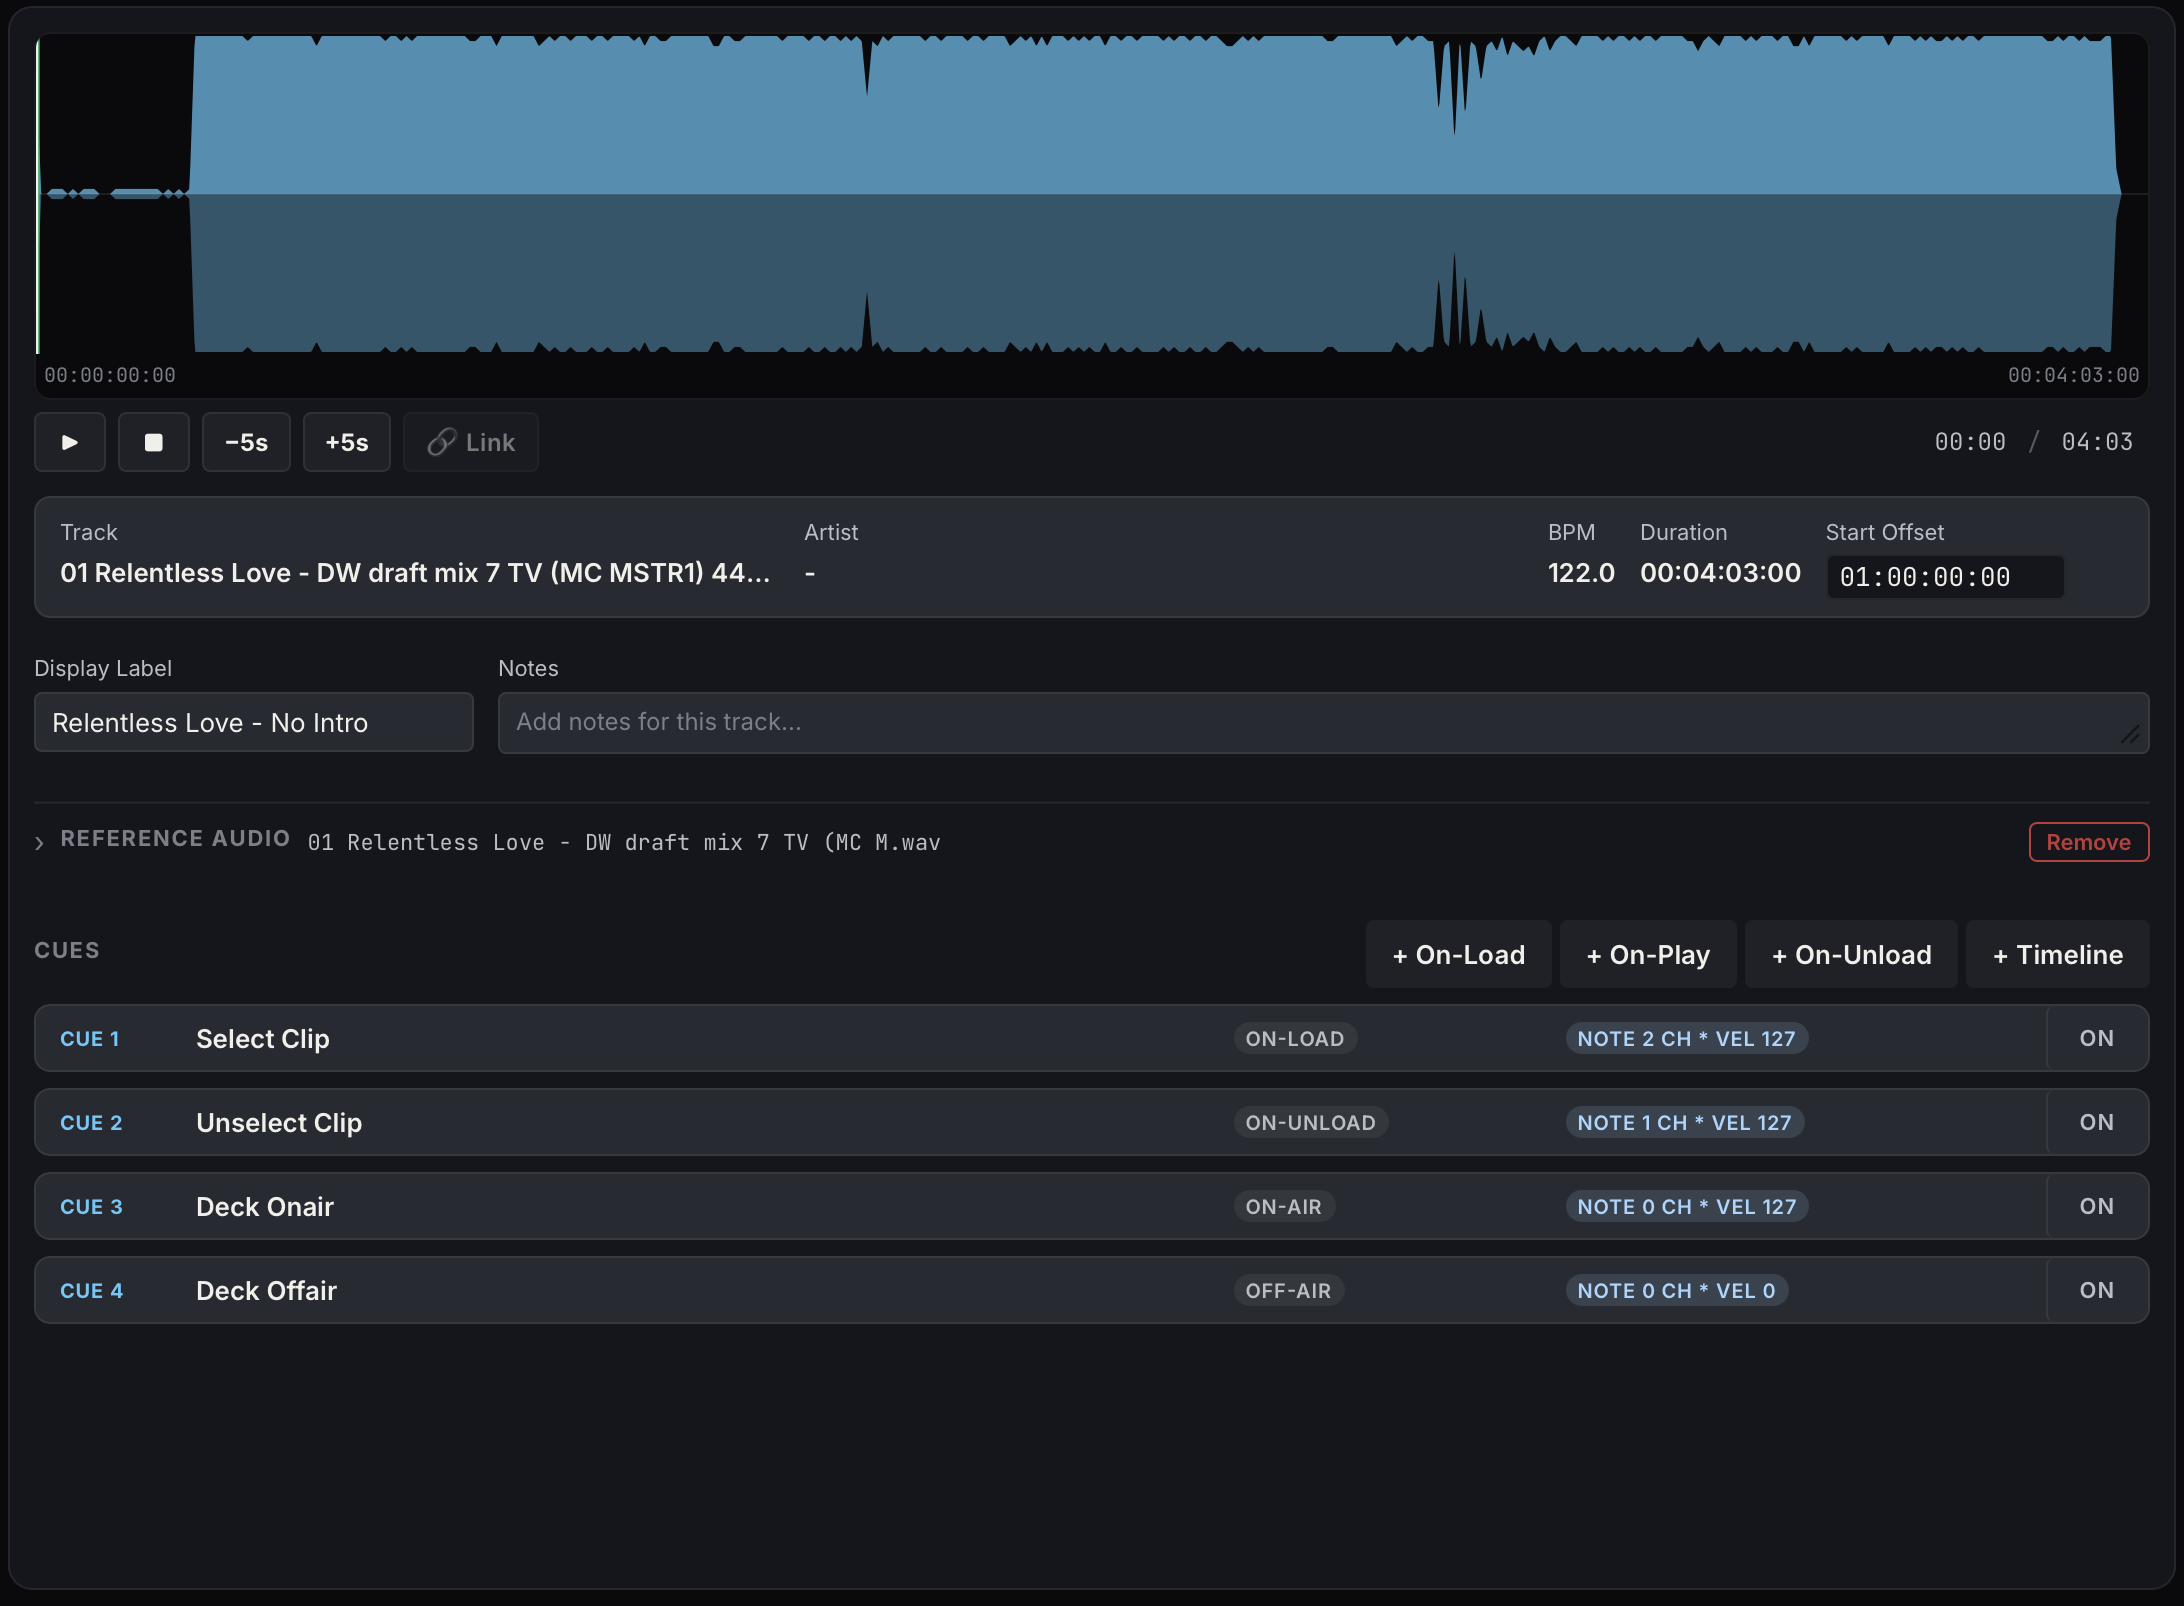
There are also On-Air / Off-Air trigger types (fires when the DJ brings the channel fader up/down on the mixer) — add a cue with any trigger, then change the trigger type in the editor.
5. Configure outputs
Section titled “5. Configure outputs”MIDI cues: Settings → MIDI → set the Cue Output Port — the default port every MIDI cue uses unless a cue overrides it.
Timecode: Settings → Timecode → set the frame rate, pick the master LTC device (or MTC port under Settings → MIDI), and choose the source mode — Auto (on-air) is right for most shows: timecode follows whichever deck is actually live through the mixer. For multi-deck timecode (each deck feeding its own line), set per-deck routing. Full detail in Timecode & MIDI.
BPM to Resolume/etc: Settings → MIDI → MIDI Clock (BPM) — enable, pick a port, done. See Timecode & MIDI.
6. Rehearse
Section titled “6. Rehearse”Click LIVE in the top bar so it goes dark — automation disarmed. Now play through the set:
- Watch the Decks page: waveform playheads, cue countdowns in the expanded cue panel.
- Watch the cue activity panel at the bottom — every trigger appears with what it would have sent, marked as blocked. You verify the whole show without a single MIDI message leaving the machine.
- For cues you want to hear for real during rehearsal, use the Test button in the cue editor, or arm LIVE and use each cue’s
live_onlyflag to keep show-only cues quiet while off-air.
Fix timings by dragging cue markers on the waveform. Changes save automatically (watch the Saved cell in the health bar).
7. Go live
Section titled “7. Go live”- Click LIVE so it lights up.
- Confirm the health bar is all green: decks online, MIDI port set, LTC device streaming.
- Keep the Decks page up. The cue activity panel tells you in real time exactly what fired and with what values.
If anything on stage misbehaves: STOP. Everything goes quiet — cues, LTC, MTC, MIDI Clock — until you clear it.
Mid-show curveballs
Section titled “Mid-show curveballs”- DJ loads a track that isn’t in the setlist — the deck card shows Capture / 📋⇨. Capture & Copy lets you pull cues across from a similar programmed track in seconds. See Tracks & setlists.
- Same song, different USB — with Track Matching on (the default), Helm DJ recognises it by content and your cues fire anyway.
- A cue misfires repeatedly — open it in the editor and disable it (the toggle keeps it in the list for later), or disable that entire deck’s automation from the runtime controls.